Enjoy a 30% discount using the code CEBUB30 before October 15th
Introduction
Decorating a ceramic vase at home offers a unique opportunity to infuse personal style and creativity into your living space. This guide takes you through various techniques to transform an ordinary ceramic vase into an extraordinary piece of art. From painting and decoupage to using stencils and adding textures, we explore diverse methods suitable for all skill levels. Additionally, we provide essential tips on maintaining and caring for your decorated vase, ensuring its beauty endures as a timeless addition to your home decor. Whether you’re a seasoned artist or a crafting novice, this article will inspire you to unleash your creativity and add a personal touch to your home environment.
Section 1: Understanding Ceramic Vases
Decorating a ceramic vase at home is more than just a creative endeavor; it’s an intimate journey into the world of art, personal expression, and interior design. A ceramic vase, in its essence, is a simple object, yet it holds immense potential as a canvas for creativity. This article aims to guide you through the transformative process of turning a plain ceramic vase into a stunning piece of home décor.
Ceramic vases have been a part of human history for thousands of years, serving not just as functional items for holding flowers or other items but also as objects of beauty and artistic expression. The allure of these vases lies in their versatility. Whether they are sleek and modern or rustic and traditional, ceramic vases can complement any interior design theme. They are like chameleons of the décor world, adapting and transforming to fit into various spaces and styles.
However, the true magic happens when these vases are personalized. Decorating your ceramic vase is not just about altering its appearance; it’s about imbuing it with a piece of your personality, your tastes, and your artistic vision. Whether you choose to paint it, decoupage it, or adorn it with textures and embellishments, each choice you make reflects a part of who you are and what you love.
In this comprehensive guide, we will explore the various methods and techniques you can use to decorate a ceramic vase. From simple, minimalist designs to elaborate, intricate patterns, the possibilities are endless. We will provide you with step-by-step instructions, practical tips, and inspirational ideas to help you unleash your creativity. Whether you are a seasoned artist or a beginner looking to try your hand at something new, this article will equip you with all the knowledge and inspiration you need to transform a humble ceramic vase into a masterpiece of home décor.
So, gather your paints, brushes, and embellishments, and prepare to embark on a creative journey. Decorating a ceramic vase at home is not just about creating a beautiful object; it’s about expressing yourself, crafting something unique, and adding a personal touch to your living space. Let’s dive into the world of vase decoration and discover the endless possibilities that await.
Section 2: Preparation Before Decorating
Before you dive into the creative process of decorating your ceramic vase, it’s crucial to prepare both your workspace and the vase itself. This stage is often overlooked, but it’s fundamental to ensuring a smooth and successful decorating experience. Proper preparation sets the foundation for your artwork and can significantly influence the outcome.
Cleaning the Vase
- Initial Cleaning: Start by gently wiping down the ceramic vase with a soft, dry cloth to remove any dust or loose dirt. It’s important to handle the vase carefully to avoid any chips or cracks.
- Washing: If the vase has been used before or has more stubborn dirt, wash it with mild dish soap and warm water. Use a soft sponge or cloth to avoid scratching the ceramic surface. This step ensures that the surface is free of oils, grime, and any residues that might hinder the adhesion of paint or other decorative materials.
- Drying: After washing, dry the vase thoroughly with a lint-free towel. Any moisture left on the vase can affect how well paints and adhesives stick to the surface.
- Final Touches: For an extra clean surface, wipe the vase down with rubbing alcohol and a soft cloth. This step will remove any remaining oils or residues and provide a pristine surface for decoration.
Preparing Your Workspace
- Choosing the Right Space: Select a well-lit and well-ventilated area for your decorating project. Good lighting is crucial for seeing fine details, and proper ventilation is important, especially if you’re using materials like spray paint or strong adhesives.
- Protecting Surfaces: Cover your work surface with newspapers, a drop cloth, or a plastic sheet to protect it from spills and stains. Decorating can get messy, and this step will make cleanup much easier.
- Organizing Materials: Gather all the materials and tools you’ll need and lay them out within easy reach. This might include paints, brushes, stencils, scissors, decoupage materials, adhesives, and embellishments. Having everything organized and at hand will streamline your workflow and help maintain your creative focus.
- Safety First: If you’re using materials that can be toxic or messy, like certain adhesives or spray paints, make sure to wear protective gear. Gloves, aprons, and even safety glasses can be important to keep you safe during the decorating process.
- Test Materials: If you’re trying a new technique or using a new material, it’s a good idea to test it on a similar surface or a small, inconspicuous area of the vase first. This helps you understand how the material behaves and if it meets your expectations.
Mental Preparation
- Visualize Your Design: Before you begin, take some time to think about the design you want to create. Consider sketching your ideas on paper. Visualization is a key step in the creative process and helps prevent mistakes and indecision mid-project.
- Set Aside Adequate Time: Ensure you have enough uninterrupted time to work on your project. Rushing through the process can lead to errors and frustration. Decorating should be a relaxing and enjoyable activity, not a race against time.
- Mindset for Creativity: Approach your decorating project with an open and creative mindset. Be ready to experiment and potentially make mistakes, as they are part of the learning process. Remember, the goal is to enjoy the process of creating something unique and personal.
By thoroughly preparing both your vase and your workspace, you set the stage for a successful and enjoyable decorating experience. This foundational step is crucial in transforming your ceramic vase into a beautiful and personalized piece of art.
Section 3: Decoration Ideas and Techniques
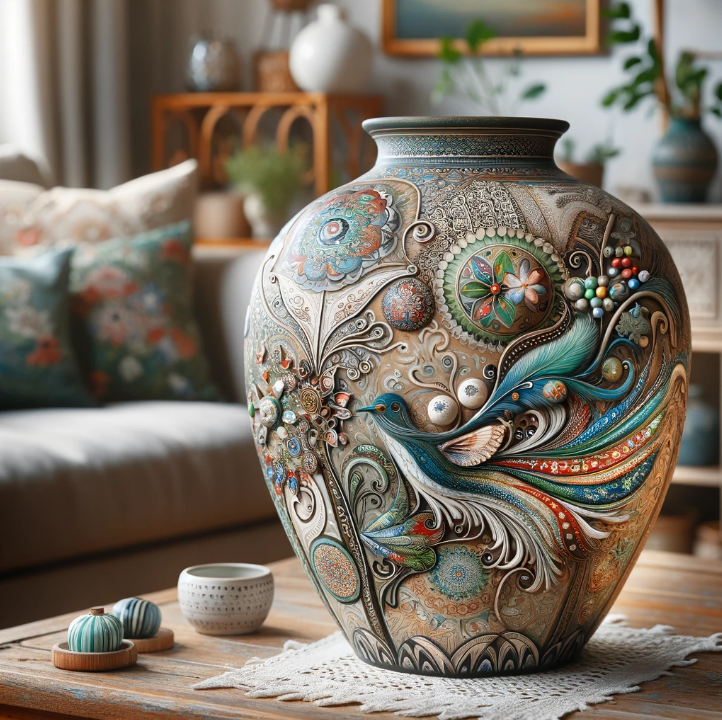
Decorating a ceramic vase offers a wide array of possibilities, each technique bringing its unique charm and style. This section explores various ideas and methods, allowing both beginners and experienced crafters to find inspiration and guidance.
Painting Techniques
Painting is one of the most accessible and versatile ways to decorate a ceramic vase.
- Choosing the Right Paint: Begin by selecting the appropriate paint for ceramic surfaces. Acrylic paints are a popular choice due to their ease of use and wide range of colors. For a more durable finish, enamel paints or ceramic-specific paints are recommended.
- Simple Painting Ideas for Beginners: Start with basic designs like stripes, polka dots, or simple geometric patterns. Use painter’s tape to create clean lines and shapes. Experiment with color blocking or ombre effects for a contemporary look.
- Advanced Painting Techniques for Experienced Artists: More experienced painters can explore detailed landscapes, intricate floral patterns, or even abstract art. Techniques such as sponging, marbling, or using a palette knife can add texture and depth to your designs.
Decoupage
Decoupage involves adhering paper designs to your vase and sealing them for a smooth finish.
- Step-by-Step Guide to Decoupage: Begin by selecting decorative paper, fabric, or napkins with your desired pattern. Cut or tear your material into the desired shapes. Apply a layer of decoupage glue or Mod Podge to the vase, place your material on the vase, and then apply another layer of glue over it.
- Selecting the Right Material for Decoupage: Choose materials that complement the color and style of your vase. Lightweight papers are easier to work with as they adhere smoothly and minimize wrinkles.
Using Stencils
Stencils are great for creating precise, detailed designs, especially for those who are less confident in their freehand painting skills.
- How to Use Stencils for Intricate Designs: Attach your stencil to the vase using tape. Apply paint with a sponge or stencil brush, using a dabbing motion to prevent paint from seeping under the stencil. Remove the stencil carefully to reveal the design.
- Making Your Stencils: Create custom stencils using thin plastic sheets or acetate. This allows for personalized designs that can be reused.
Adding Textures
Textures can add a tactile element to your vase, making it not just visually appealing but also interesting to touch.
- Techniques to Add Textures: Use items like textured rollers, lace, or even leaves as stamps. Apply a thick layer of paint and press your chosen texture into it before removing it to leave an imprint.
- Materials to Use for Texturing: Apart from paint, consider using materials like air-dry clay, epoxy resin, or fabric to add 3D textures to your vase.
Incorporating Nature
Incorporating elements from nature can give your vase an organic and unique look.
- Using Natural Elements for Decoration: Press leaves, flowers, or thin twigs into wet paint or clay. This method not only adds texture but also brings an outdoor, rustic feel to your vase.
- Ideas for Seasonal Themes: Reflect the seasons in your decoration. Use bright flowers and leaves for spring, warm colors and textures for autumn, or snowflake designs for winter.
Each of these techniques can be used individually or combined to create a truly unique and personalized ceramic vase. The key is to experiment and have fun with the process, allowing your creativity and personal style to guide you in transforming a plain ceramic vase into a beautiful and bespoke piece of art for your home.
Section 4: Adding Embellishments
Embellishing a ceramic vase is an excellent way to add an extra layer of uniqueness and personality to your creation. This section focuses on the types of embellishments you can use and the techniques for applying them effectively to your ceramic vase.
Types of Embellishments to Use
- Beads and Stones: These can add sparkle and texture. Consider various sizes and colors to create patterns or to highlight certain areas of your vase.
- Ribbons and Lace: Fabric elements like ribbons and lace can introduce a soft, elegant touch. These work well for creating themed vases, such as for weddings or special occasions.
- Metallic Accents: Using gold, silver, copper leaf, or metallic paints can bring a luxurious feel to your vase. They’re particularly effective for highlighting raised textures or patterns.
- Glass or Mosaic Tiles: Small tiles or broken pieces of colored glass can be arranged to create a mosaic effect. This technique is great for creating detailed, eye-catching designs.
- Natural Elements: Shells, pebbles, or dried flowers can be glued onto the vase for an organic, earthy look. This approach is perfect for vases that will hold natural elements like plants or flowers.
Gluing Techniques for Different Embellishments
- Choosing the Right Adhesive: The choice of glue is crucial. For heavier items like stones or glass, a strong epoxy or a specialized ceramic glue is recommended. Lighter items like lace or ribbons can be attached with hot glue or clear craft glue.
- Surface Preparation: Before applying any adhesive, ensure that the vase’s surface is clean and dry. This will help the embellishments adhere better and last longer.
- Applying the Adhesive: For precision, use a toothpick or a small brush to apply glue, especially for small or intricate embellishments. Ensure that you apply enough adhesive for a secure hold, but avoid excess that could spill out and mar the appearance.
- Setting the Embellishments: After applying the adhesive, carefully place your embellishments on the vase. Press gently but firmly to ensure a good bond. If necessary, use tape or elastic bands to hold the embellishments in place while the glue dries.
- Curing Time: Allow sufficient time for the adhesive to dry and cure completely. This might vary depending on the type of glue used and the weight of the embellishments.

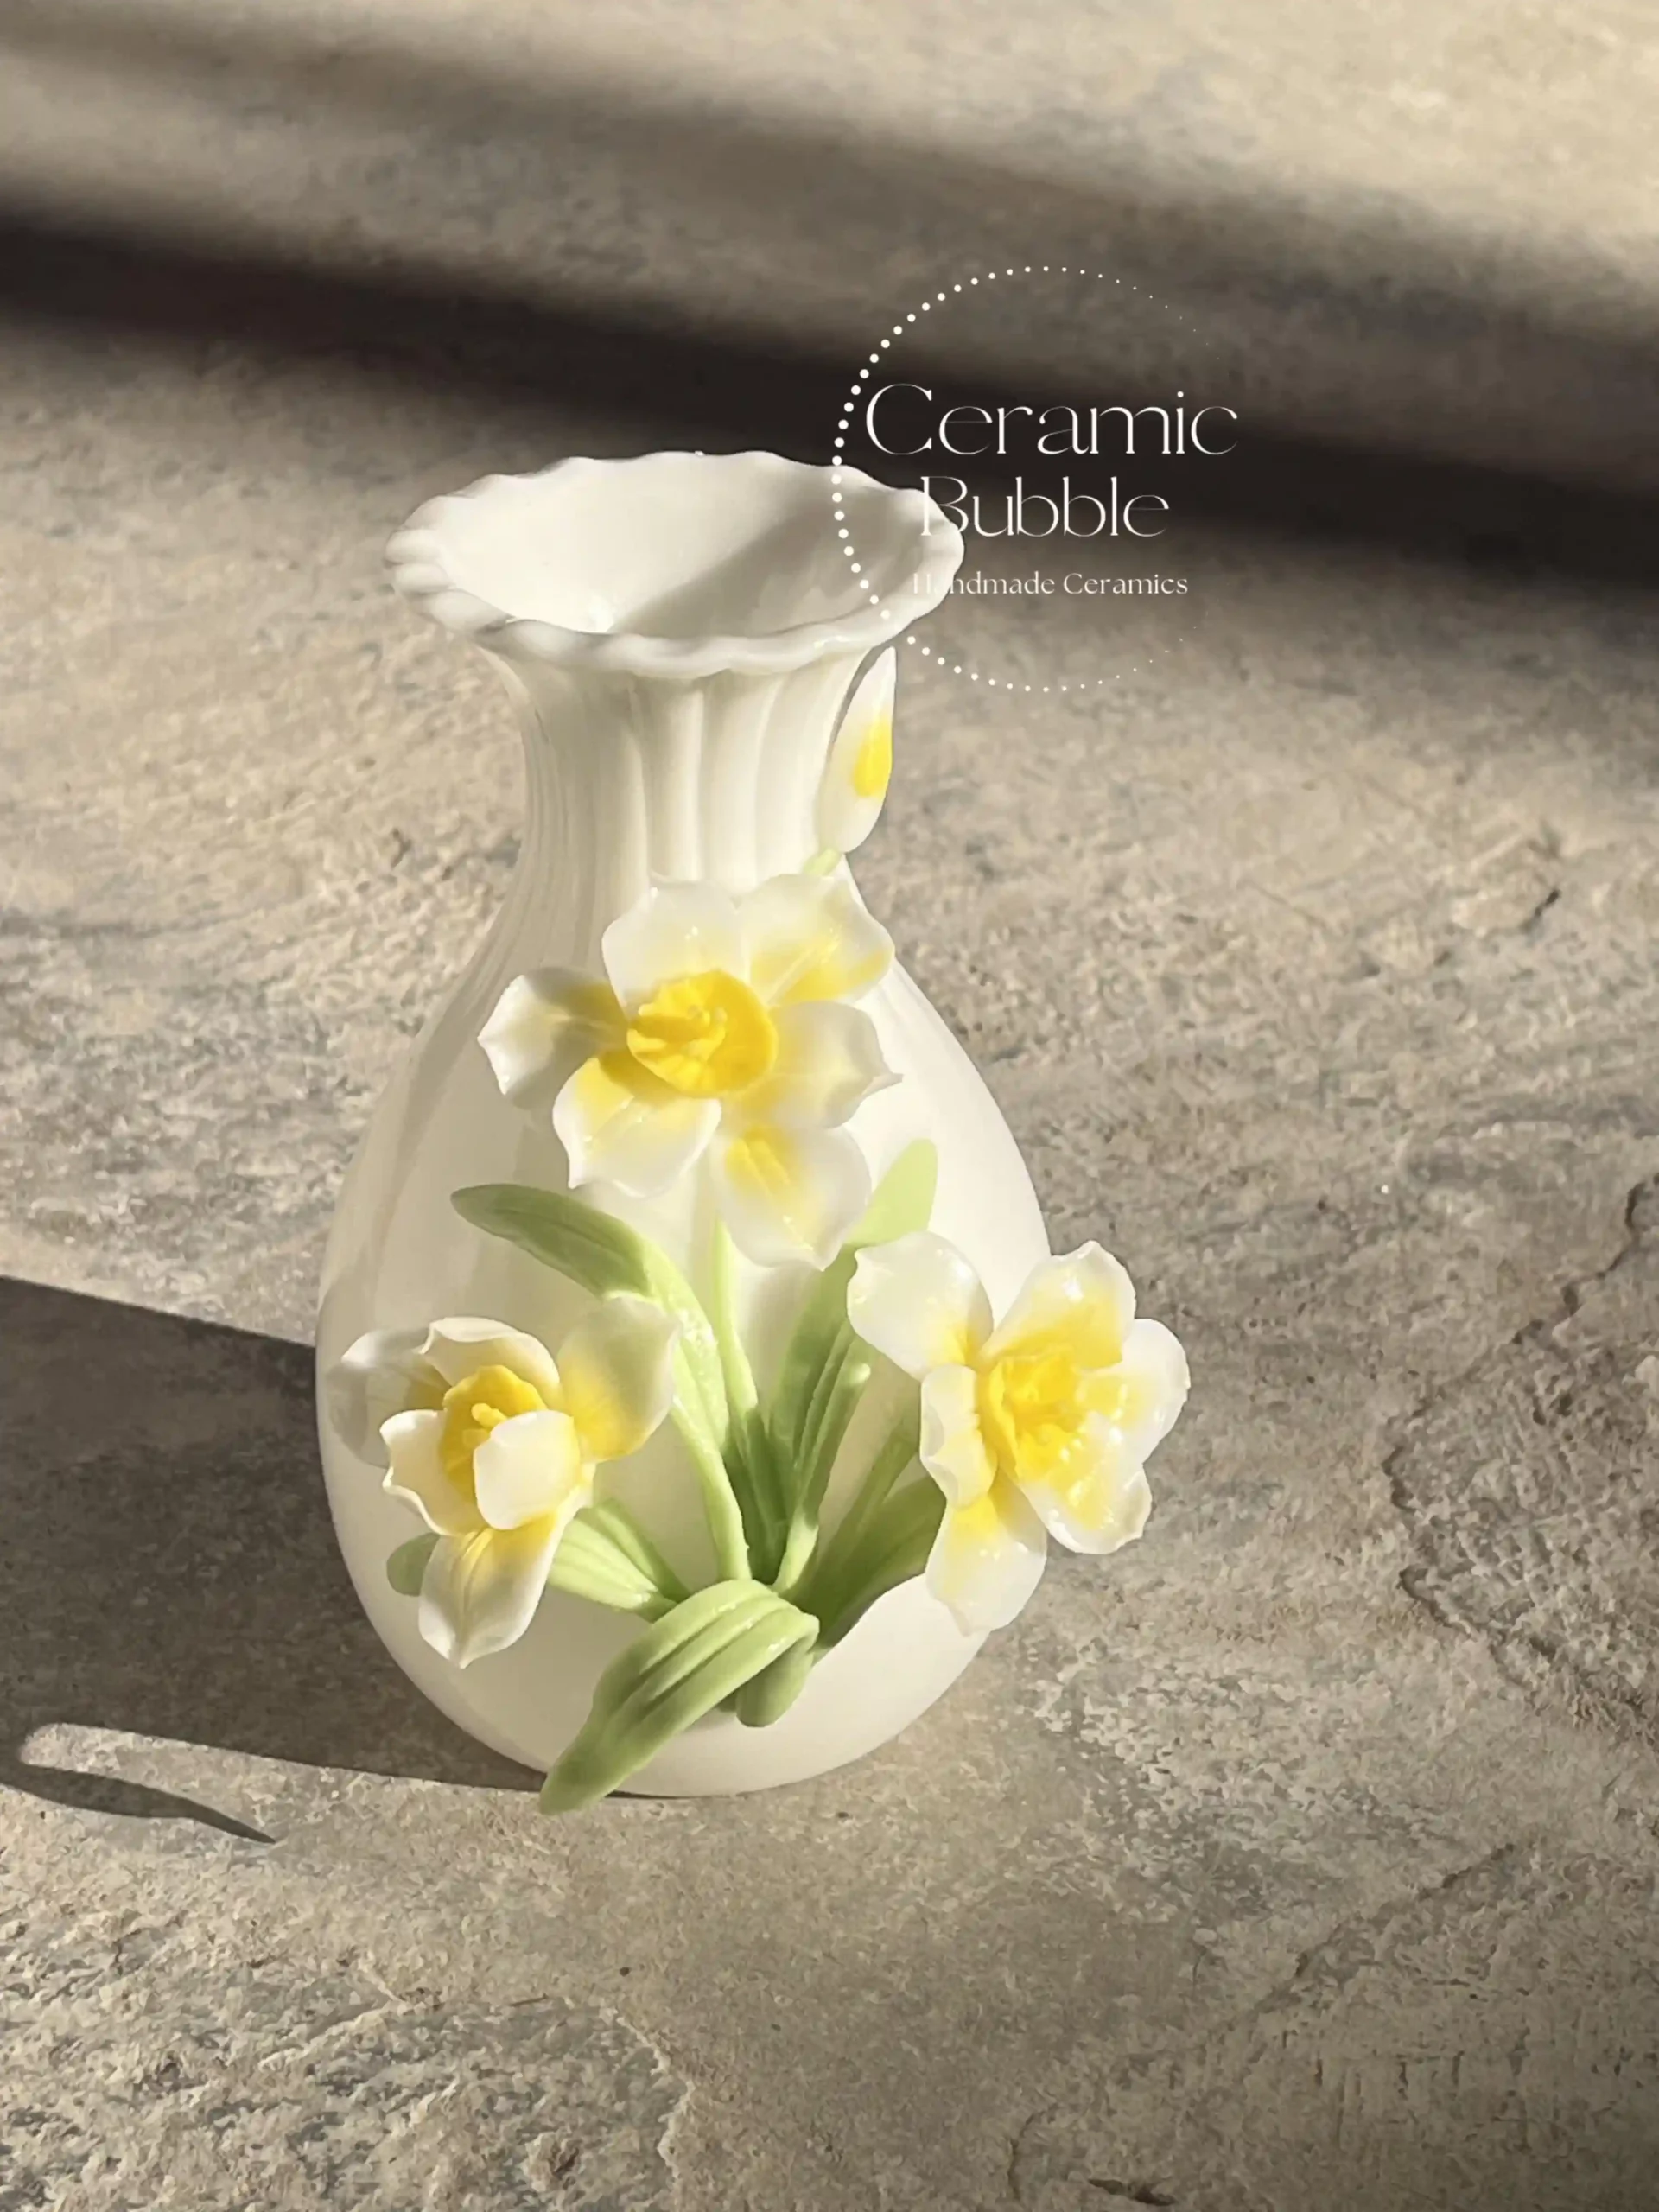
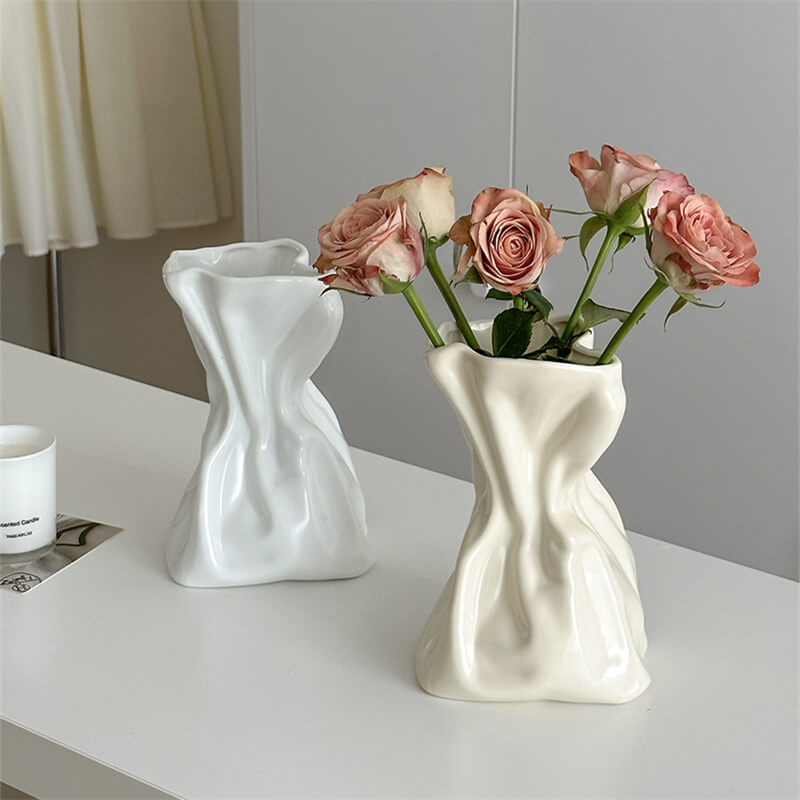
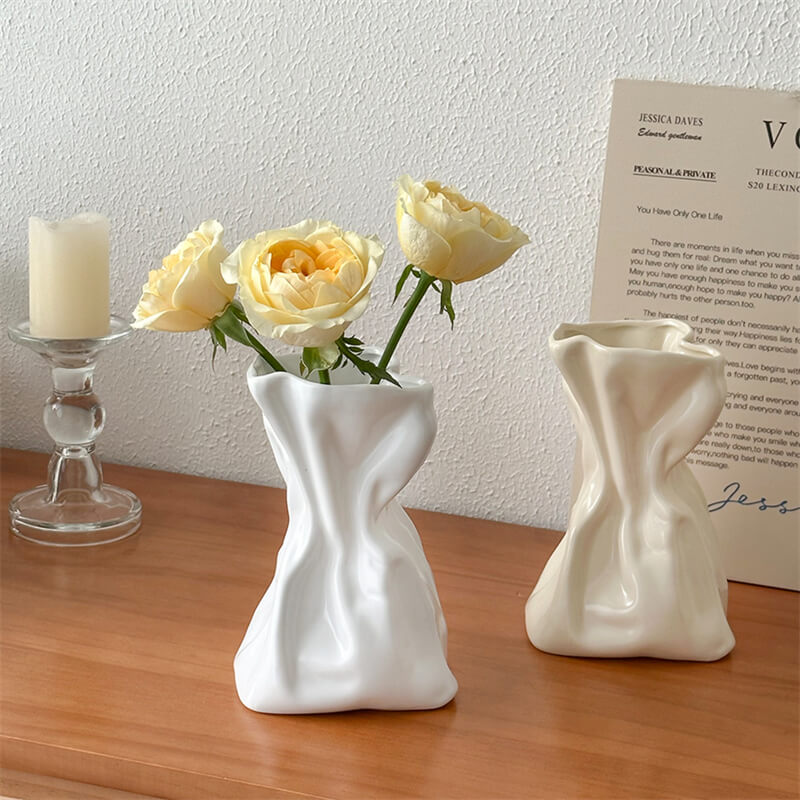
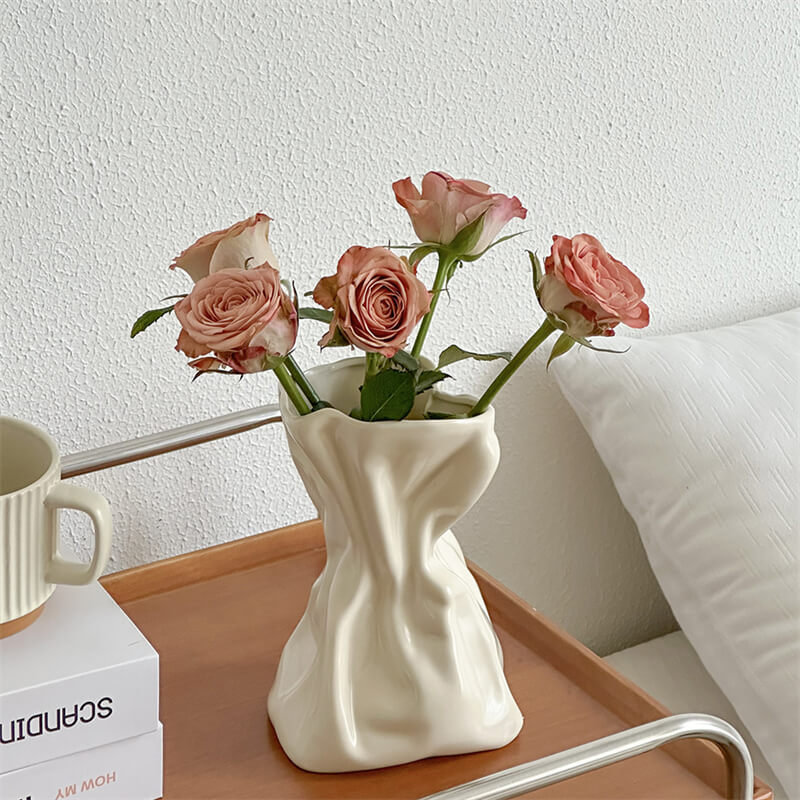
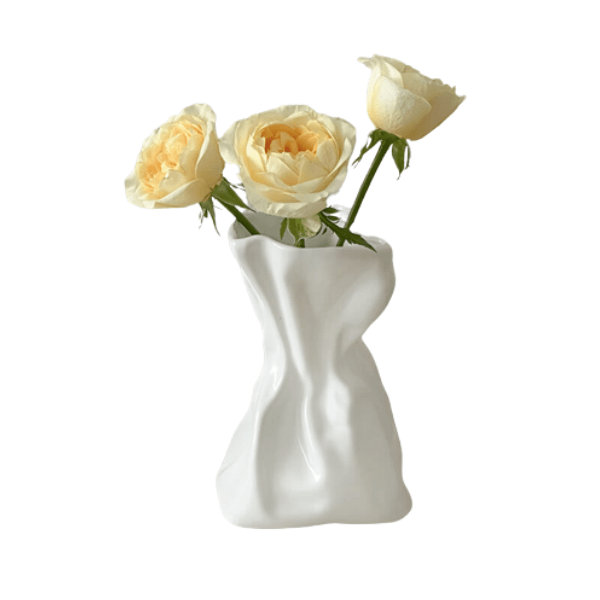
Minimalist Irregular Design Vase
The irregular design of this vase can bring you a pleasant mood and add a touch of sophistication to your life.
Beyond their visual appeal, these vases boast long-lasting durability and easy maintenance, promising to remain a cherished part of your home for years to come. Don’t miss the chance to bring home a vase that seamlessly combines function and artistry, adding a touch of sophistication to your living spaces.
Section 5: Finishing Touches
Once the main decoration of your ceramic vase is complete, it’s important to add finishing touches that not only enhance its beauty but also protect your artwork. These final steps are crucial in ensuring that your vase maintains its allure over time and can withstand regular use.
Sealing the Vase for Durability
- Choosing the Right Sealant: The type of sealant you use can greatly affect the longevity and appearance of your vase. For painted vases, a clear acrylic sealer is ideal as it provides a protective coat without altering the colors. If you’ve used materials like fabric or paper in your design, consider a decoupage sealant like Mod Podge.
- Application Method: Apply the sealant evenly with a brush or spray it on for a smoother finish. Multiple thin coats are better than a single thick coat, as they prevent drips and ensure even coverage.
- Drying Time: Allow adequate drying time between coats, as recommended by the sealant manufacturer. This not only ensures durability but also prevents smudging or sticking.
The Importance of a Protective Finish
- Preserving Artwork: A protective finish safeguards your design from wear and tear, moisture, and fading. It’s especially important if the vase will be used to hold water for fresh flowers.
- Enhancing the Look: Depending on the type of sealant used, you can achieve different finishes – matte, satin, or glossy. Each finish can dramatically affect the overall look of your vase. A glossy finish, for instance, can make colors appear more vibrant and give the vase a polished look.
- Considerations for Food Safety: If you plan to use the vase for anything edible, make sure to use a food-safe sealant and only decorate the exterior of the vase.
Additional Decorative Elements
- Adding Embellishments Post-Sealant: Sometimes, adding small embellishments like crystals, beads, or metal foils after sealing can give your vase an extra dimension of beauty.
- Using Non-Permanent Decorations: For those who enjoy changing their décor frequently, consider adding elements like ribbons, lace, or seasonal decorations that can be easily changed without affecting the vase’s permanent design.
In conclusion, the finishing touches are not just a final step in the decoration process but are essential in ensuring that your beautifully decorated ceramic vase remains a lasting and cherished piece in your home. These steps, while seemingly small, play a significant role in the durability and aesthetic appeal of your finished piece, allowing it to be a source of pride and joy for years to come.
Conclusion
In conclusion, decorating a ceramic vase at home is a delightful and enriching experience that combines creativity, personal expression, and the joy of crafting. Through various techniques like painting, decoupage, stenciling, and texturing, anyone can transform a simple ceramic vase into a unique piece of art that enhances their home decor. Each method offers a way to imprint your personality and style into your living space.
The beauty of this project lies not only in the creation of a decorative item but in the process itself. It’s an opportunity to explore your artistic side, experiment with colors and materials, and perhaps discover a new hobby. The act of decorating becomes a therapeutic and fulfilling journey, culminating in the pride of having created something beautiful by hand.
Moreover, the maintenance and care of your decorated vase ensure that it remains a lasting testament to your creativity and effort. With gentle handling, proper cleaning, and occasional touch-ups, your vase can continue to adorn your home and bring joy for years to come.
As you embark on your vase decorating adventure, remember that there are no strict rules. Creativity is about exploration and experimentation. Whether you’re a seasoned artist or a beginner, the key is to enjoy the process, let your imagination run free, and watch as a plain ceramic vase turns into a masterpiece that reflects your unique vision and flair. Happy decorating!